
Load Balancing and High Availability Setup
A single server, however powerful, is a single point of failure. We design load balancing and high-availability architecture so traffic keeps flowing when an instance, a zone, or even a region has a bad day — and so growth is handled by adding capacity, not by hoping the one box holds.
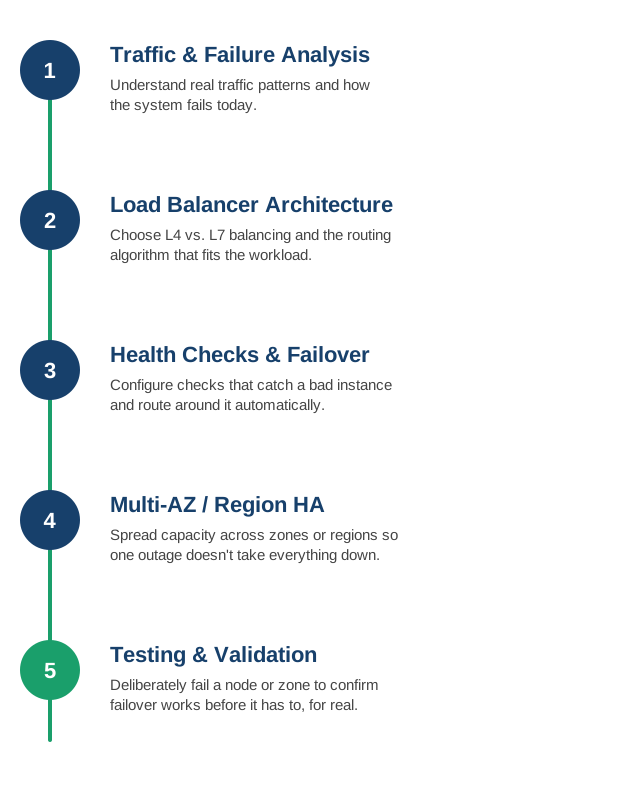
1. Traffic and Failure Mode Analysis
We start with how traffic actually behaves today and how the system fails today, so the design solves real problems instead of hypothetical ones.
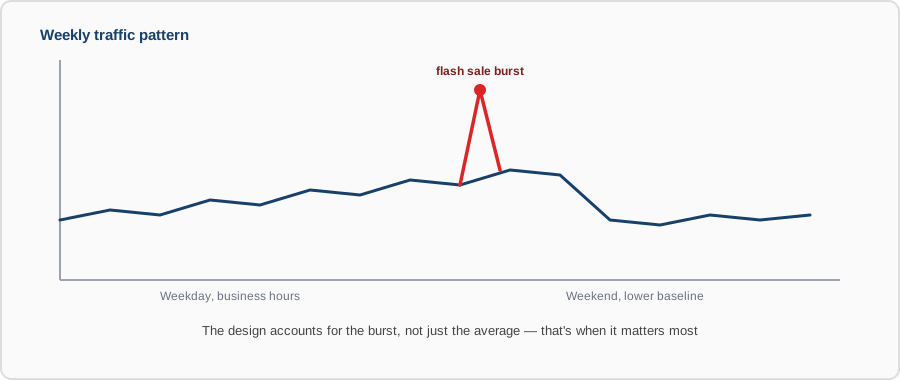
- Traffic pattern analysis: peak load, burstiness, and geographic distribution of real traffic, not assumed averages.
- Peak load: daily, weekly, and seasonal peaks identified from actual logs, and sized against p95/p99 request volume — not the daily average, which hides exactly the spikes a load balancer needs to survive.
- Burstiness: how fast traffic actually ramps during a flash sale, a marketing push, or a viral moment — the burst-to-baseline ratio and ramp time determine whether autoscaling can keep up or whether headroom has to be provisioned in advance.
- Geographic distribution: where real users are, not where the business is headquartered — this drives decisions on regional points of presence, CDN placement, and whether a single-region setup is even viable for the latency users expect.
- Time-of-day shape: traffic that follows user timezones rather than a flat curve, which affects when maintenance windows and scaling events are actually safe to run.
- Historical outage review: what's actually gone wrong before is the best predictor of what the design needs to handle.
- Dependency failure modeling: understanding what happens to the whole system when one backend, one AZ, or one dependency fails.
- Capacity headroom check: confirming current capacity assumptions before designing around them.
2. Load Balancer Architecture
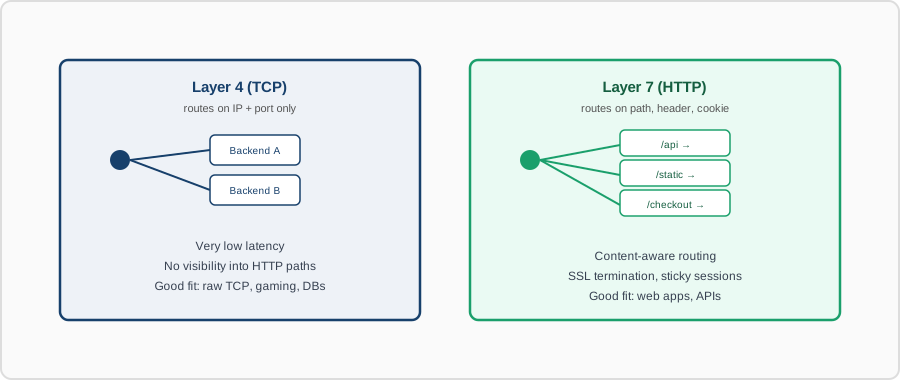
Layer 4 or Layer 7, round-robin or least-connections or something workload-specific — the balancing approach is chosen to match how your traffic and backends actually behave.
- L4 vs. L7: raw TCP/UDP balancing versus content-aware HTTP routing, chosen based on what the application actually needs to route on.
- Routing algorithm: round-robin, least-connections, or IP hash — picked to match how evenly (or not) your backends should share load.
- SSL/TLS termination: deciding where encryption ends — at the load balancer or passed through to backends — based on your security requirements.
- Session handling: sticky sessions where state requires it, avoided where it doesn't, since stickiness works against even load distribution.
3. Health Checks and Failover
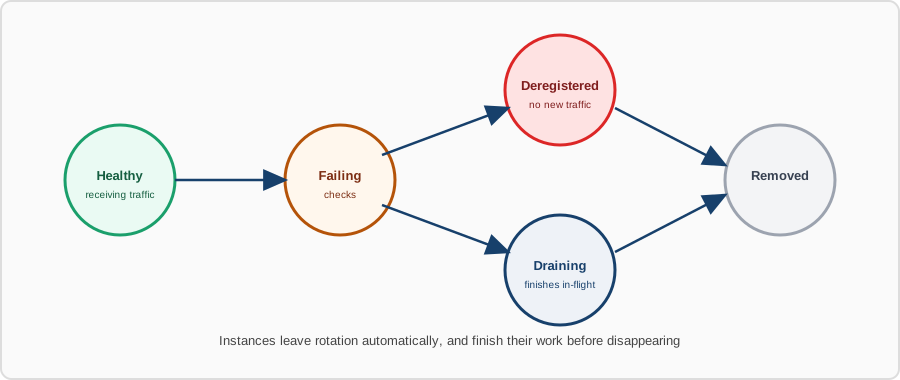
Health checks are configured to catch a genuinely unhealthy instance — not just a dead process — and traffic is automatically routed away from it without manual intervention.
- Meaningful health endpoints: checks that verify the application can actually serve requests, not just that the process is running.
- Check intervals and thresholds: tuned to catch real failures quickly without reacting to a single transient blip.
- Automatic deregistration: unhealthy instances pulled from rotation immediately, with no manual step in the loop.
- Graceful draining: instances being removed finish in-flight requests first instead of dropping active connections.
4. Multi-AZ / Multi-Region HA Design
Capacity is spread across availability zones or regions where it matters, so one zone's outage degrades capacity instead of taking the whole service down.
- Availability zone distribution: instances spread across zones so a single zone failure removes capacity, not the entire service.
- Active-active vs. active-passive regions: chosen based on whether cross-region data consistency is worth the added complexity.
- Cross-region data sync: replication designed around the same RPO thinking used in disaster recovery planning.
- Regional failover mechanism: DNS-based or global load balancer failover, tested to confirm it actually redirects traffic when a region degrades.
5. Testing and Validation
We deliberately fail a node, a zone, or a backend to confirm failover behaves as designed — validated before it's needed for real, not assumed.
- Chaos engineering: deliberately killing instances or links in a controlled way to confirm the system responds as designed.
- Failover drills: scheduled tests of zone or region failover, not a one-time check when the system first went live.
- Load testing at scale: confirming the balancing and failover logic still behaves correctly under real production-level load.
- Synthetic monitoring: continuous automated checks from outside the system, catching issues the same way a real user would hit them.
Contact us to review your current setup's failure points, or to design high availability in from the start.